Saturday 29 June 2013

Long time, no post, another package


As there hasn't been a lot of progress since last post, I've waited with posting more. However now, I've got another package in the mail containing:
  • 9x4.7 propellers
  • Another 5000mAh battery
  • Spare 3.5mm and 5.5mm gold connectors
  • 85dB lost signal alarm
  • 3.5v uBEC
I ordered the propellers to have some slightly weaker than the 10x5.0 propellers I ordered previously. I've kind of come to the conclusion that the motors and propellers I ordered are slightly over powered to what the quad will weigh. These propellers will slightly reduce the thrust.

Another battery will gain 5000mAh more and 450g weight. This will counter the thrust and also give more flight time if used in parallel with the old battery.

The lost signal alarm is activated if the signal is lost for more than one minute and will sound at 85dB. This is a cheap insurance policy to find a quad that might lay wrecked in a bush somewhere it'd otherwise not be found.

I ordered the 3.5v uBEC before I understood that the OrangeRX radio receiver I have wants 5v. I blame that on my dyslexia ;).

Another plus is that I've got advance notice of that my package with the replacement motor will be available for pickup Monday. Stay tuned until then!

Tuesday 25 June 2013

Ladybird key chain camera construction

I just remembered that I hadn't documented the way that I attached the key chain camera to my Ladybird. As I described in an earlier post, I'm using Velcro to attach the camera upside down to the bottom of the Ladybird. I'm also using a soft and sticky padding to angle the camera in the right position slightly pointed downwards.


The first post was however with the camera pointed slightly upwards, which in general is a bad idea when recording things below the camera ;).

An update regarding the package containing new motors is that I've received a tracking number and that the package should be on it's way. Hopefully I'll receive the package before my vacation is over.

Monday 24 June 2013

New video page

Short update, I've added a page with recorded videos in the list of pages to the right. Also, there is a new video available from earlier today :).

Lady bird flies with a new camera

I bought this Mini DVR 808 key chain camera a while ago as many RC model enthusiasts use them for cheap video recording.

It works fairly well and records in 720x480 with a pretty narrow angle lens. Having a wide eye lens would however have been ideal for this kind of video recording. There are however other cameras that feature that but not for less than $7.

I'd recommend removing the plastic container by unscrewing a couple of screws to reduce the weight of the camera. This is what I've done to fit it to the ladybird, still it feels like it's pretty overweight at the moment. I fitted the camera using Velcro to make it possible to remove the camera if desired.


This is my first attempt to do any kind of recording so please don't mind the quality :).

You might notice that the date and time annotation is upside down, that is because I had to mount the camera upside down on the Ladybird to be able to access the start/stop buttons. I then used the enhancement features from YouTube to rotate the screen :).


Sunday 23 June 2013

It's alive!

Just got my Lady bird back from the dead with the help of my tree climbing father :). But it's got company and it seems as of a spider have moved in and laid some eggs. Will try it in a day or two after it's dried out from any water left in is motors.

Saturday 22 June 2013

Maiden flight flipped over

Today I flew my quad for the first time. It left the ground and within less then one second flipped over..

It seems as if one of my motors isn't running correctly. Each electric motor, as most people know, consists of a number of magnets that are energised in sequence in order to turn the propeller. However, if one or more of these magnets are faulty, the propeller will not turn as intended. This is something that the motor early on indicated as the propeller seemed as if it didn't start up as early as with the other motors. I choose to ignore that and drove up the throttle, which then made the propeller turn and accelerate as the others. This then made the quad to flip over each time I tried to fly.

As this blog states, I tried to keep my budget low and to buy cheap parts. The motors I'm using are branded Turnigy. That brand is a cheap Chinese pirated copy of another brand, which also makes it less reliable. I was then also early on recommended to buy a few extra motors while ordering to be able to coupe with one of them to be broken on delivery. That I never did. So, today, I've ordered two extra motors plus two ESC's as I actually don't know if they may be faulty as well.

Another thing, I tried to mount the prop savers to the engines today to be able to save the propellers if I'd crash only to figure out that I'd ordered prop savers with the wrong dimension of the propeller shaft. Ordered 4mm prop savers now also instead of the old 3mm.

Thursday 20 June 2013

One wire too short

I've been assembling the quad today and it turns out that I'm one wrote too short, or actually a few too short. The wires from the ESC's that are to connect to the power distribution board are a few centimeters too short... This means I need to solve that before there will be any flying :(

Wednesday 19 June 2013

No success without a little ooops!

Progress! I've got both radio modules talking to each other after flashing with the openLRSng firmware. I actually didn't do any changes to the default settings and it compiled without any issues. The upload of the firmware however was a bit complicated.

As I mentioned in a previous blog post, I bought a USB serial converter called CP2102. What I probably should have bought was a FTDI adapter. This adapter has a pin called DST, which is needed to auto reset the target board when the new firmware has been transferred. The CP2102 however does not provide easy access to the DST pin. The solution was, as many others have done is to do a make shift soldering on the USB adapter in order to provide access to the DST.


And, first off, I cannot take credits for this tiny soldering. It's been done by a another guy who is far better than me. The solution consists basically of connecting pin 28 from the chip in the middle to output on the RST pin. A resistor was also removed to break the RST connection to not get double signals. I actually removed the resistor and made the other soldering, which probably was way easier. Soldering the wire to the 28th pin of the chip had to be done under a microscope :).


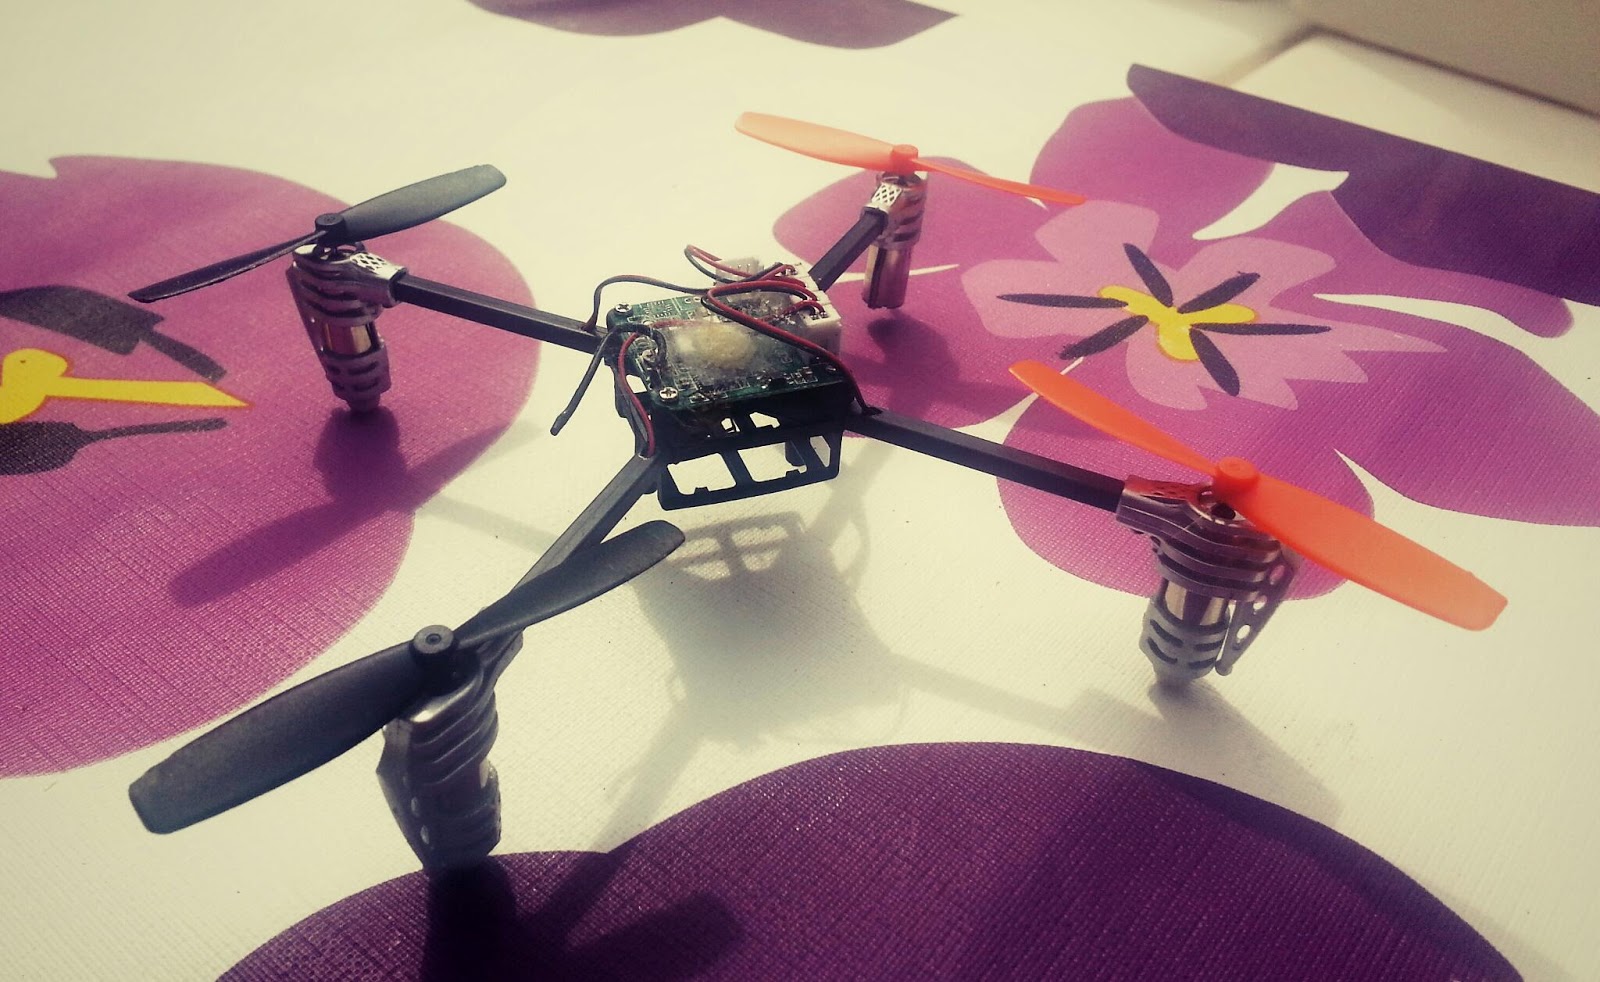
So, now we've got a working radio link that I've verified to provide signals that work as intended. The picture below shows how I've connected the radio receiver to the power distribution board, which also connects to one of the ESC's that connects to one of the motors. I'm now in the process of programming and calibrating the ESC's. This is needed to ensure that all motors behave in the same way and provide the correct amount of power given the throttle.

Todays ooops! happened when I by accident short circuited the battery and left some ugly marks. I should have put shrink tube on the soldered connectors of the power distribution board before playing with it, but I didn't :[.


Sunday 16 June 2013

Sub projects and more

Notice the sub projects link to the right, it contains identified sub projects that need to be completed to finish the quad.

Yesterday I finished soldering all four ESC's. I've also secretly assembled the quad frame and attached it's motors. Behold for future pictures ;).

What's needed to get the radio running is 3.3v. It's specification specifies that it can receive 3.3-12v, which apparently isn't entirely true. Incidents according to forum posts where people have used one of the 5.5v outputs the radio have resulted in burnt circuits. Some people have recommended using a separate battery pack consisting of 6x AA batteries, which would provide 3.7v. Other than that, there is a 3.3v uBEC available from HobbyKing. I think I'll also arrange for a separate battery pack and maybe order the uBEC sometime in the future.

Saturday 15 June 2013

Fixing up the power distribution board

Today was a day of soldering. Two tasks had to be performed to make the power distribution board work as intended. First off, it's connectors were incompatible with the connectors of the battery pack. That was solved by cutting away the TX60 connector and soldering a pair of 5.5mm gold connectors instead.
You can spot the old yellow TX60 connector up in the top right corner of the picture. New connectors were soldered after some trouble with the thicker soldering tin I bought today. I bought 2mm soldering tin, which turned out to be a pain to use as it took quite a bit of heat to melt. I ended up using thinner soldering tin instead.

Thereafter, I soldered the uBEC current converter onto the auxiliary power connectors on the power distribution board. The uBEC is intended to connect the power distribution board to the flight controller. As of the specification, the flight controller may switch anything from 5 to 12v but forum posts recommend using an external uBEC instead as overheating then only destroys the uBEC and not the entire flight controller.
The picture above shows the uBEC soldered to the power distribution board's aux connectors as well as the new 5.5mm gold connectors.

I've also soldered another ESC today with the same amount of success as the last one. Think I'll do another one tonight. Next question is, how do I bring voltage to the radio receiver? Not figured that one yet, stay tuned.


Friday 14 June 2013

First soldering ever!

This is my first soldiering I've done as far as I know and I've done five bullet connectors without any disasters!


What I'm actually doing is soldering 3.5mm gold connectors onto one of the ESC's. This is because these ESC's as most others are delivered without any connectors. The other way would have been to solder the ESC right on to engines and power distribution board but as both those were equipped with bullet connectors, I thought it'd be wise to keep that standard. I also want to keep my model in modules so that each part is replaceable without any heavy soldering.

Thursday 13 June 2013

Cirus All-In-One Multiwii and MegaPirage flight controller

Today I made my first firmware build and fired up the Multiwii flight controller for the first timer. Here is a small sample of the feedback I got when I tried it out.


Only a short update today as I haven't been up to a lot yet other than this. I need to buy some "helping hands" in to start soldering connectors onto those ESC's. It's a common tool used when soldering as you often need a pair of extra hands. You can buy them online at Banggood but I think I'll buy them at a local hardware store as they don't cost much more over here.

Wednesday 12 June 2013

Packages!

This is what I fetched from the post office just now. As far as I know this should be more or less it and I don't miss any vital parts.

 
About the transmitter which I thought to be less than complete, actually is complete. I've been in contract with HobbyKing and got it all cleared out. 

Now it's just to start putting things together. The first task will be soldering connectors to the electronic speed controllers (ESC). Will be back with progress..

Sunday 9 June 2013

Ladybird flies no more..

My Ladybird flew into a tree this morning and is now stuck some 20 meters above ground. I didn't have the time to try and get it down now but will try at a later time.

The then that, I've got packages waiting at the post office but won't be able to fetch them for a week or so due to work out of town. Next post will hopefully contain a lot of unboxing :).

Tuesday 4 June 2013

Lost or stolen package content?

So I received another package in the mail today. This was all about the radio. Now it was pretty obvious right away that something had happened to the package. Someone have obviously broken into the Turnigy radio transmitter package. It's been ripped open and somewhat closed up and most of it's content is missing as you can see here on the picture.


The other things I was all intact and according to the package manifest. From left to right; back lights for the non-lit LCD display on the transmitter, OrangeRX radio receiver for the quad side and radio transmitter module to fit on the Turnigy radio transmitter.


I've just filed a complain to Hobby King's customer service and I guess we'll take it from there. This is a bad setback that I didn't expect and I hope that it can be solved. The transmitter was not that pricy but still $49.

Sunday 2 June 2013

A tribute to Team Black Sheep

Just shortly would like to share a video created by a team that both builds RC models and creates great videos. Team Black Sheep has both aeroplane and quadrocopter models for sale including complete FPV kits. I don't think I'll be looking at anything that advanced for any foreseeable future anyhow.

Enjoy!


Team Black Sheep website and web shop

Saturday 1 June 2013

The Ladybird flies again

After some vital reconstruction and replacement parts, my ladybird flies once more. It's body was completely shattered and had to be replaced. That was done using the spare body I bought a couple of weeks ago again from Banggood.
Did you however notice how I mounted the new body sideways? The battery should face vertically, not horizontally as on the picture. But it doesn't seem to mater :).